Friday, August 12, 2011

Clean & Organized!

This summer there have been a lot of changes going on around here and I'm just about done with my summer "house overhaul!"  I am hoping to update the House Tour page very soon with new updated pictures but until then, I'll share a few before and afters to show just how much better things are starting to look at my house! 

Awhile back I posted a picture of the office, which sort of became the catch all while we were painting because it is the only room we weren't painting this summer.  Here is what it looked like in the middle of our painting marathon:

And here it is after several hours of cleaning!  (Same room, I promise!) :
It is very excited to be able to walk into the office again!  Another before picture was posted recently after my parents surprised me by painting my bathroom for my while I was gone.  Although the paint job was great, some major organization was needed:
 And after a few hours and several little plastic storage totes with labels:
Now I can actually find things!  And these are just a few of the highlights to my updated house - can't wait to share the new House Tour pictures soon, so stay tuned!


Monday, August 8, 2011

Yard Sale Score!

I headed out to the annual 127 Corridor (aka The World's Longest Yard Sale ever!) hoping to find two things.  One - a bench for the foot of the bed in the guest room (to be my first "reupholster job"!).  Two - a small desk/table to use as a vanity in the guest room (hoping for 25'' length or less - hard to find!).

The first stop was at a friend's house.  I was there mostly for the quick visit, but did score this cute frame for 25 cents!
The frame is probably going to get some spray paint, but I'm still deciding what color.  I originally thinking ORB-ing the frame and finding a neat little black & white picture to hang in the guest room.  I was also thinking of spraying it silver and using it as a mini tray in the guest room.  I'll have to think about it.

Before leaving this stop, I'd already spotted the next stop across the street.  They had giant glass paneled doors for only $5!  I really wanted one, but I have a little too much on my plate right now to commit to fixing up an old door.  I've seen such cute ideas for those types of old doors, though, that one is definitely in my future!

Next, we headed off and after a few miles in both directions, we still hadn't found anything we couldn't live without.  So we kept driving and ended up at a antique store running a 20% discount for the yard sale-ers.  This is where my luck kicked in.  I found both of the items I was looking for!  I spotted the bench first and knew it was coming home with me right away.
I played it cool though, looked around some more, then came back ready to bargain down the price a little more.  (Note: I left the actually bargaining to my Mom - she's much better than I am.  I play my part well though, by staring at the item in question, shaking my head, then making several "thinking" sounds.  Team work.)  We got her down to 25% off and with my new bench in hand, we started heading out of the store.  I was already thinking of what color fabric and paint I was going to use updating this bench when I saw the desk!  It's an old writing desk and seemed like it was the perfect size for the vanity desk.  I put the bench down and measured it with a borrowed tape measure - it was 26'' - almost perfect.  I decided to take my bench for now and go home to re-measure the space in the guest room and possibly come back for the desk.

Once we unloaded the bench at my house, I headed straight for the guest room with measuring tape.
The exact length of the wall (the one the mirror is laying on) is 26''!  I realized that the desk would stick out a little, though, because of the baseboards, but not only was this desk adorable, it was probably one of the few desks that will fit here!  So we headed back for our second purchase of the day and ready to do some more bargaining (or in my case, head-shaking and thoughtful-sound-making).  We got her to come down 30% on the writing desk, and once again, I was heading out of the store with my arms full!  After a good dusting, I hauled the desk up stairs to see how perfectly the new "vanity" fit in the space.
Perfect!  I already have a few update ideas for this piece too, however it'll probably be a little while before I get a chance to work on it.  For now, the pieces will be sitting as-is in their intended places and we'll all just have to use our imaginations until I get around to the "after" part!

Tuesday, August 2, 2011

Nerdy Excitment & Pinterest Challenge Love

I shared my first Pinterest Challenge project this morning on Young House Love thinking that a few other readers might be interested and I would get a few more hits than normal, maybe a few comments.  Within the the first hour I was already nearing the 100 views mark!  At this point I've had over 450 people stop by my little blog to check out my first project - some half way across the globe!


And the overwhelming number of views is not all I'm nerding out about!  I was just browsing (and procrastinating - yikes!) on Pinterest looking for new DIY ideas to try for the next challenge having been inspired by so many interesting ideas shared this morning when I cam across... my own project! Yep, thats right.  My projects and blog have officially by pinterest-ized!

Eek!  To quote Sherry @ YHL, "Geeked out and excited doesn’t even begin to describe it."  :)

Summer Overhaul: Cleveland Rocks!, a Nice Suprise, and the End of Painting

Last week I was in Cleveland on a mini vacation.  You may be asking, "Cleveland? Really?"  Yes. Cleveland.  Who could resist after this inspiring "hastily made Cleveland tourism video"?

                                       
We did see the "art" and tried not to die! :) Fun was had, though, believe it our not.  We went to the Rock N Roll Hall of Fame, of course.

We also made it to the zoo and rain forest.
We got faked a little culture at the art museum.
We found something more on our level with a children's money tour at the Federal Reserve Bank.
After learning (and practicing as seen in the middle picture!) how to pick out counterfeit money, learning a ton of slang terms for currency, and making our own money (in crayon...) we decided to head for one more adventure - a haunted mansion!
Franklin Castle is so haunted, that it is closed to the public.  You are supposed to be able to hear people screaming from inside still...so we stayed in the car! (You can see the review mirror in the bottom left...evidence of my cowardice!)

After several hours of driving on the most dull interstate ever, we made it back home and headed straight for the bathroom thanks to our large cokes at lunch.  I soon noticed that not one, but both bathrooms had been freshly painted!  Apparently Mom and Dad had secretly been working on my house the whole time I was gone!  (Yeah, they are pretty great like that!)  Not only was this an awesome surprise, but it finished up our painting marathon!!  No more paint fumes and drop clothes all over the house and no more super dark bathrooms!  So, although I can't take credit for the bathroom make-overs (Mom&Dad also helped with the pictures for this too!),  I will share the progress as part of the collective summer overhaul.  So, let's start with the smaller downstairs bathroom.

Here is a before picture of the downstairs bathroom.  You can see the awful, dark greenish-brown color and the beginning of primer work.
 All primed (it took two coats) and no more ugly, darkness!
 And now freshly painted in Fairytale Pink.  It looks so much lighter now!

The same ugly, dark greenish-brown was also used in the upstairs bathroom, so I decided to continue with the light pink.  Before I left and before the painting started we did make a few help modifications. First, we added hooks to the wall right outside of the shower -a much more convenient location.
Next, I moved the toilet paper holder, which was quite a reach, from here (white patches under the towel was the original location).... 
...To here.  Another much more convenient switch and I updated the holder to one more my style.
Once these basic switches were made pre-Cleveland trip, Mom and Dad jumped right into priming the upstairs.
 All primed, after a couple of coats.  The dark ugly color is completely gone from the house -hooray!

 And the whole room is now much much lighter in pink!
Now I just need to get the shelves organized - yikes!  (Working on this now - stay tuned!)

P.S.   Thanks Mom&Dad! :)

Sunday, July 31, 2011

Pinterest Challenge: Project #1

In this recent post, I accepted the Pinterest Challenge, and mentioned the idea behind my first project.  Though, I felt it was cheating to repeat a project, I did want a "do-over".  I made the first one, from this post, for the space above the television and I just never really liked to for that space.  I decided to hang the old one over the staircase for now because this space was empty and needed something.  (I usually have some seasonal decoration to hang here - but I don't have anything for summer yet).
Once again, the space above the television was empty...

So I figured, why not try again?  This time I wanted to change the color and the design.  So I headed over to Pinterest.  Here was the Pin-spiration:
                         
Instead of creating my own design like last time, I decided that I actually wanted to replicate this pattern as much as possible since I liked the circular-type formation for the space above the T.V.  So I dug out my box of toilet paper rolls...
 ...(I've made my parents begin to collect them now too!) and started cutting and arranging the design.
Once I had the design down, I broke out the super glue and the clothes pins and got to work.

Soon I realized that super glue was not the best option.  I used super glue the last time, so I automatically started using it again this time, but this project required a lot more glue.  So I dug out my glue gun and kept on gluing. 
Then I was finally happy with the size of the design (and I ran out of pieces!) and I was ready to paint!
With the pieces all glued together, I headed out for some spray paint.  Originally, I assumed I'd paint it white mostly because I couldn't think of another color that would look good in the living room, but I wanted to change things up from the last project, which was painted white.  I decided to try Oil Rubbed Bronze, which I'd seen and liked on Young House Love.  Now I think I found a new favorite go-to spray color!!  

 Now that the piece is finished and up on the wall, I love it.  First, I think this design fits the space here much better than the last one.  Second, I love the color choice - the ORB makes the piece look like a shiny metal instead of cardboard!  Overall, I'm very happy with this project and plan to do more toilet paper art work in the future!  For now though, I found made something neat for the empty space and I have my first Pinterest Challenge Project finished.  One down!!


P.S. Go check out the original Challengers:
Katie @ Bower Power

Friday, July 29, 2011

Summer Overhall: The Past, Present, and Future Library!

The library (one of my favorite parts of my house!) is finally done!  Well...at least for now.  I still have several updates planned for this space, but for now the changes so far are a huge improvement.  Let's start at the beginning, though.  Here is what the library looked like when I moved in about a year and a half ago:

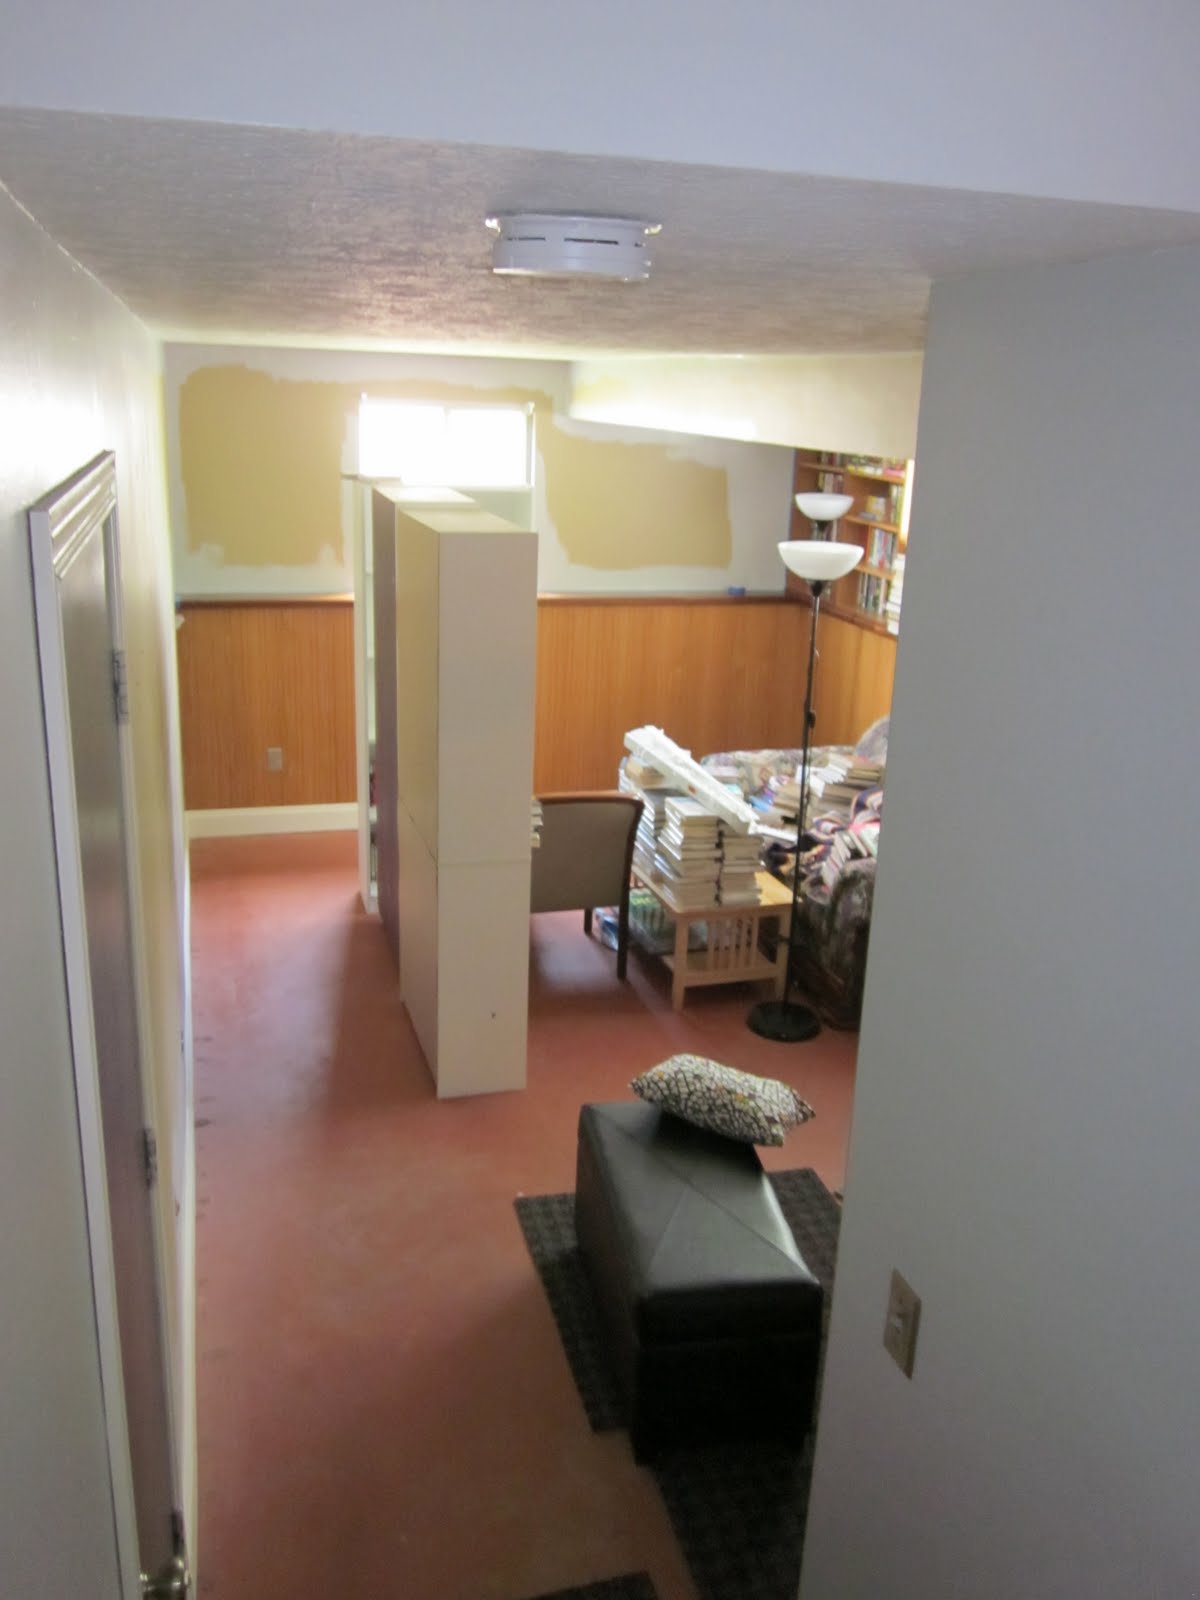
Because this room is the first room you walk into from the garage (aka: my main entrance), a lot of stuff started collecting here.  This is what the library looked like a few weeks ago - yikes!
Needless to say, it needed to be cleaned out before we could paint.  So, I started in one night and a few hours later.  (..and yes, that is a Twilight movie poster on the back wall - I'm only slightly embarrassed to admit that!)
Much better.  The library was still a difficult room to paint, though, because I have so, so many books!  We ended up doing half one day and half the next so that we could manage all the books without having to lug them all over the house.  Here are some of the "in progress" pictures we managed to snap in the chaos of those days:

Then, after our marathon painting session (we were soo tired of the gray color by the time we started painting this area!!), we took a break to run out and grab a new white book case.  As you can see by the stacks in the picture above...I can always use more shelves! Now I have 5 five-shelf white book cases and 4 of the four shelf built-ins, which means you can legitimately be surrounded by books down there now! Here are a few pictures of the library as it is now - all painted, organized and with the new bookcase:

Very pleased with the progress made so far in the library, but I still have a ton of ideas for updating this space.  And so begins the list...

1) The concrete floors. 

I haven't quite decided what I want.  Do I continue with the hardwood floors like the rest of the house?  Do I paint the floors a like-able color, maybe with some cute designs?  Do I cover the ugly floor with a giant rug?  Not sure.  Yet!  But the floors are at the top of the to-change list.

2)  The furniture.

My parents were nice enough to let me have the sofa and brown chairs when I moved in so that I wouldn't have to sit in the floor (although I do think they were just wanting to get rid of these pieces so that it freed up space in their house - I still appreciate it!).  The coffee table was a quick purchase before moving into my first apartment my sophomore year at college.  

These pieces have been so useful so far (and continue to be used right now!), but I hope to swap them in the future.  I'm wanting to get a giant, comfy reading chair and chaise.  I would also like to get a new coffee table, but I may just end up painting the one I have now.  These updates will happen eventually and if I somehow money starts growing on trees... (*fingers crossed*), I'd love to get all new floor-to-ceiling bookcases to make better use of the space above my current bookcases.

3) Art work.
As you can see, bookcases and windows take up most of the wall space in this room, but I'm still looking for some library-ish art to work into the room.  Right now the only thing on the walls (besides books!) is this READ poster - which I absolutely love:

Although I framed it quickly to prevent it from getting funky, I have yet to actually hang it up on the wall.  Right now it is just propped up on the window-level shelf.  Eventually it will make it up on the wall :)

Next, I recently found this so so neat (but expensive -yikes!) idea for art that would be outstanding in the library!  Obviously I tend to collect books in general, but I collect two titles in particular. 


I started collecting any decent and interesting copy of A Tale Of Two Cities (Charles Dickens) or Pride & Prejudice (Jane Austen) that I find - and the older the better!  Which leads me to the neat idea.  Today while (procrastinating) I found this on Pinterest.
The full book printed out on a poster around cute little silhouettes.  Seriously?  This was too good to be true.  So I Googled.  There is a company called Spineless Classics that offers posters of various famous novels.  Each poster is a legible, full-text "spineless" version with a recognizable image "cut out" of the text.  Why am I just now hearing about these?  Wow.  And, believe it or not, it gets better! :)
They also have both of the titles I collect!!
How amazing would these look behind my collections of each book?!  It could be mind-bottling..."You know, when things are so crazy it gets your thoughts all trapped, like in a bottle?" (Anyone? Name that movie!)

Anyway, it's something to consider for the future and dream about now.  I know.  What a nerd-dreaming about books printed as posters for their person library...but this librarian wanna-be can't help herself!  And rationalize with this: There are many worse addictions than books! :)