Saturday, October 20, 2012

Blog Heaven at the Book Festival!

I got to meet two sets of DIY Blogging idols today!  I went to Books by the Banks Book Festival today with the intent to get a signed copy of YHL at J&S's first book tour stop, and though it was a close call, I got one of the books before they sold out and got to meet the couple before they headed over to set up for their talk!  (Check them out here:  www.younghouselove.com)
Then, grabbing a set up close for the talk, I ended up sitting right next to Dana (with HH & baby M) from House*Tweaking! (Check her out here:  www.http://www.housetweaking.com)  It was almost too much excitement for this wannabe DIYer!!

In a side note:  Though Gone Girl is currently in its 19th week on the NYT Bestsellers list, and currently at #3 under only JK Rowling & James Patterson, Gillian Flynn's line was zilch compared to J&S's line (which circle the convention center).  Though I didn't understand her lack of audience, considering the past and current success of the book, I was thrilled for the opportunity to meet her too!


Sunday, September 23, 2012

Bedroom and Closet Make-Over Plans!

I've never really gotten my bedroom set up in a way that I'm happy with, which lead me to start search Pinterest for ideas.  Here is basically what I'm working with at the moment (I've made a few updates since this photo was taken -- new lamp from Target, new night stand from Ikea, bed was moved but you get the idea!!)

Lately, I'm all about rooms with one purpose - library for reading, living room for lounging, bedroom for sleeping, office for working, etc.  It really helps my focus and relaxation.  With this in mind, I wanted to get things unrelated to sleeping out of the bedroom -- this being clothes and the excess furniture pieces.  I've also wanted a better bed set up.  Originally I loved the look of the simple bed on a plan metal frame with wheels, but this has proven a horrible idea on my hard-wood floors.  After a night of tossing and turning, I (and my bed) end up on the other side of the room!  So, with all of this in mind, it's time for a redo and I have a plan in mind! Here is the main pinspiration I found:
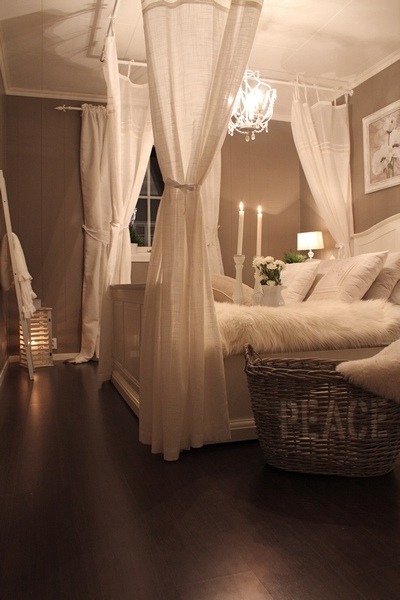
I love how peaceful and comfy it looks!  Surely conducive for sleeping!  To create this look in my room I going to try to emulate with more of my touch and style.  First, I'm thinking of going with a darkish gray wall (or possibly sticking with my deep turquoise color) instead of the warm tan in the above image.  Maybe something like this:

Then I'm going to use lots of sheer white, flowy curtains around the bed and window, an awesome bed frame from Ikea (oddly enough, the same one in the pinspiration picture above!), some white fluffy rugs and finally, a fake fireplace!  Yep, fake fireplace opposite the bed!  I'm going to find an old mantele piece, attach it too the wall, and put candles in place of the fire.  Kinda ike this from Young House Love , but with candles and a wood mantel, not brick....geez, you get the idea!:

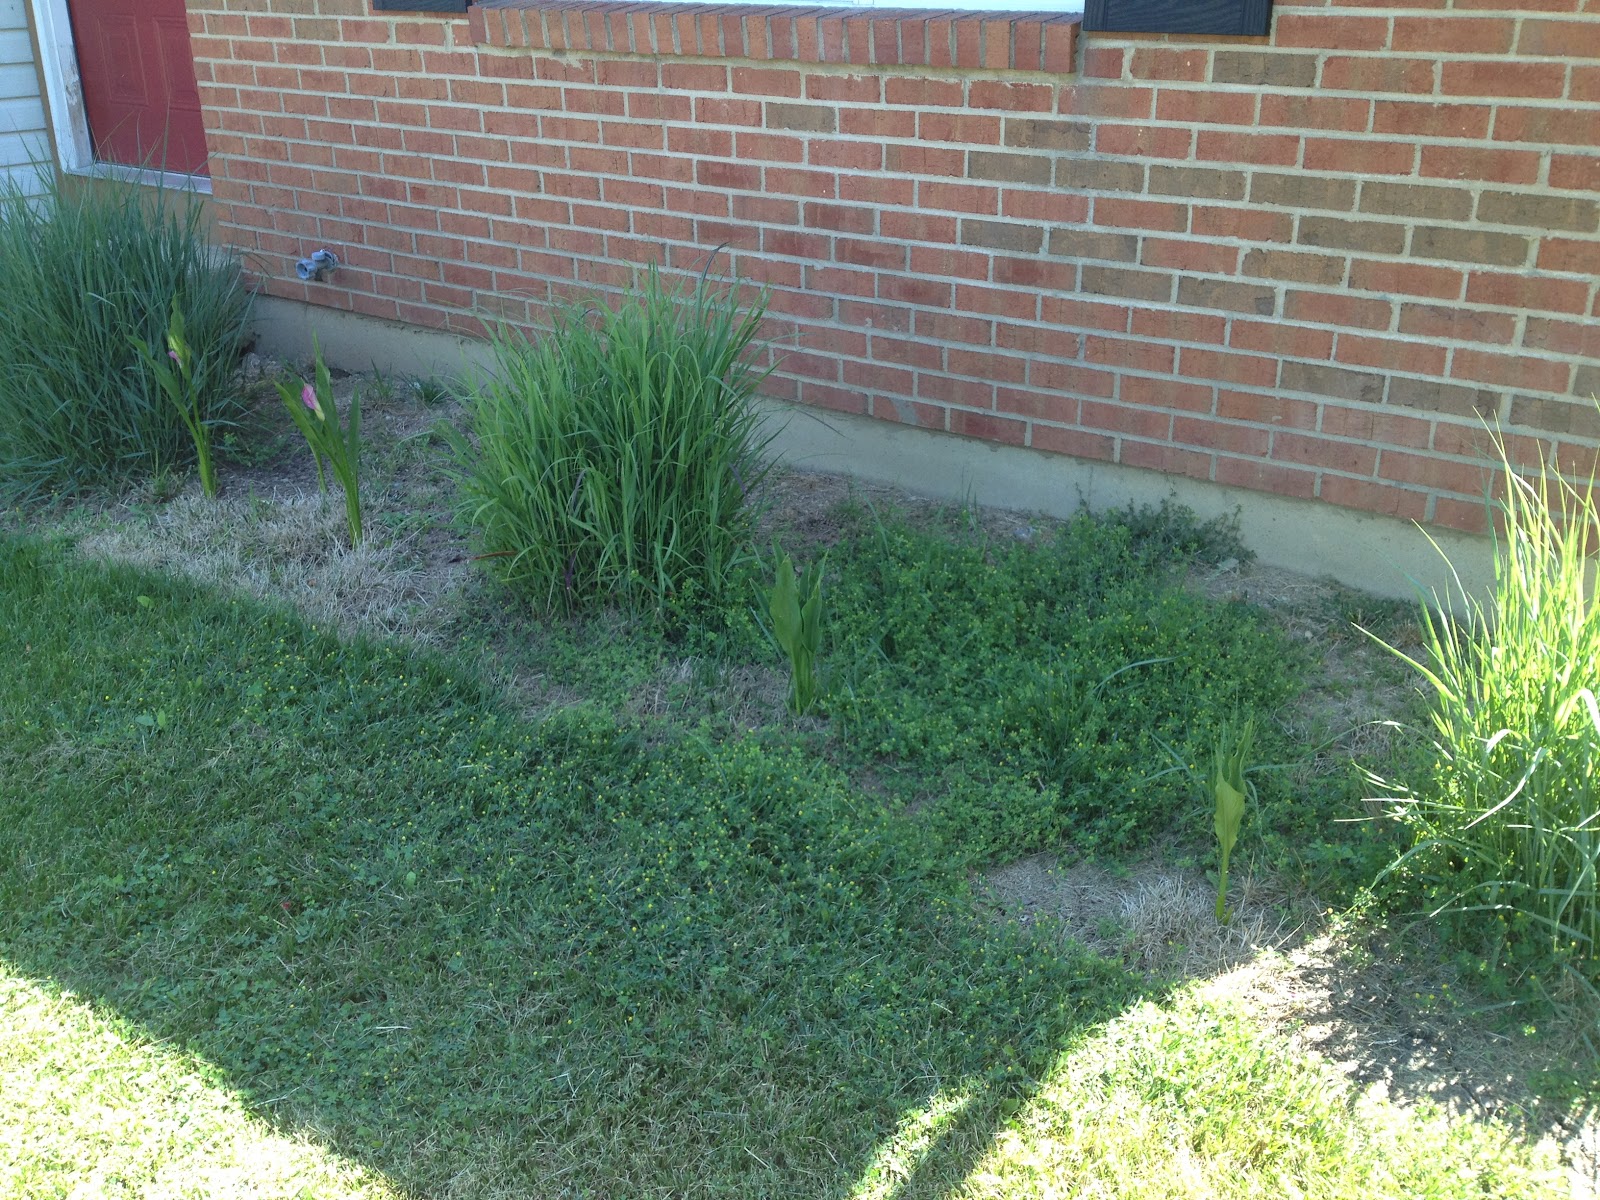
To accomplish this, I will need to move the dresser out of my bedroom, which led me to to the guest room.  I've had my very very cute guest room set up for over a year, and not one guest.  Here is said very very cute guest room:
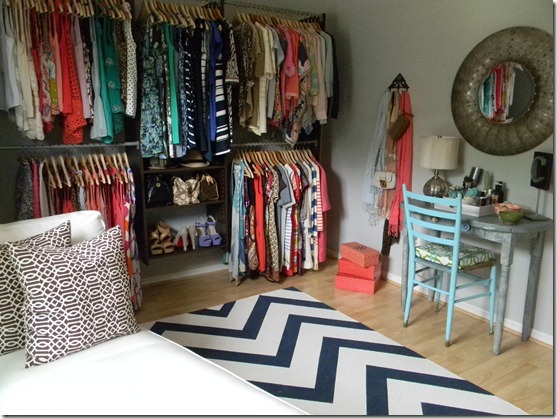
See how cute? :)  Well, what is the point of have a cute guest room with no guests??  Especially when it could be....wait for it....a GIANT WALK IN CLOSET?? Like this

Yeah..I know, I'm pretty excited too!  For now though, I'm hoarding ideas on Pinterest, shopping around for ideas, saving some $$, and fantasizing about my new bedroom and giant walk in closet/room!! Stay tuned! :)

Friday, June 8, 2012

Yard work!

Last year we tackled the inside with all the painting.  This year we are taking on the yard!  Dad started us off by power washing my deck.  I can not believe what a difference it makes.  Here's a sneak peak, but look for more posts when the deck is complete.  (No stain yet, just power washed! Amazing, right?)

So while Dad was working on the deck in back, Mom and I decided to take on the front yard.  To start the morning right, Mom decided we could just pull this small dead tree out of the ground with our bare hands...  Surprisingly, after a little see-saw action, we got it out of the ground, roots and all!  I didn't remember the before picture, but here is the hole, ready for the new tree next week!
Then we started on the front flower bed.  So far it has looked like a random group of weeds.  This is what it looked like last summer.

Then last August before my belated "open house" party, I cleared out all the weeds and grass and arranged a few flower baskets so that it wasn't an eye sore.
But by this time almost a year later it was looking pretty rough again...

After some hardcore weeding, some deadheading on the rosebush and THIRTEEN! bags of mulch, my front yard is finally starting to look like it's on purpose!

Stay tuned for the new tree for the front yard next week!

Friday, June 1, 2012

Sew Difficult!

My mom bought me my first sewing machine recently and I couldn't wait to get started on a project.  I found this cute little squared make-up bag to try out on Pinterest.

This lead me to a great tutorial on the blog, Say Yes to Hoboken, which I followed exactly to make my own make up bag.

I started by gathering my materials...

Then I started in on setting the machine up...which was "fun"!


Finally got that stupid bobbin to thread!!

Don't be too overly impressed by my amazing sewing ability!  I know it looks awful, but once it was finished you could hardly see this mess I made!


Getting close! Halfway done and things really got easier from this point!


All done with my very first project!

Final product!  Not the best item every made, but not bad for my first sewing project ever!  

Monday, April 16, 2012

Finally, an Owl!

I've been loving owls lately and stumbled upon this little guy at a thrift store recently.


I immediately grabbed him up (for $1!!) and brought him home.  After a few healthy coats of spray paint, I have a cute little owl to hang up on one of my many empty walls!

Not sure where to hang him up yet and so hesitant to start punching holes in the walls after working so hard to patch and paint them this summer!  So for now, he doesn't have a home, but keep an eye out for him in future posts!

Wednesday, March 14, 2012

Pinterest Challenge: "Winter" Edition

For my "Winter" project (I put winter in quotes, because it is 80 degrees and beautiful outside  here in southern Ohio as I type this post! Crazy!!), I finally finished a project I've been planning on and working towards for a while.  And though it didn't turn out quite like I'd hoped, I'm still happy to have it completed and not a complete disaster!

My Pinspiration originally came from Michelle at Sweet Something Designs.  She created this neat little bottle cap tray that loved!  I knew I wanted to make one for my guest room!  Here is the original picture from her wonderfully made tray:

The hardest part - the part I've been working on - was collecting enough bottle caps in decent condition.  I spent many nights working on that bottle cap collection and even have a friend collecting them for me now too!  Once I found a tray at Goodwill to use....


I played around with the caps until I found an arrangement I liked... 

Then I gathered the rest of my supplies - acrylic water kit, spray paint, & the source of my last bottle cap!


I spray painted the tray several coats of plum and the painted the caps an even number of plum, white and lavender.  I let it try in the garage overnight.  The next evening I collected all my painted caps and my tray and mixed the acrylic water set as directed.  (Michelle's blog post suggested looking at Walmart for the least costly version and that's where I found the best deal!)  


This is were I ran into a major problem... well, two problems technically.  First, the handle holes weren't tall enough to allow me to use enough acrylic water to fill over top of the caps, which caused this weird film over some of the caps - the ones that got some on top before drying.  Two, my tray wasn't put together as solidly as I thought and the acrylic water soon leaked out from the bottom all over my counters!  I had to set it outside on some cardboard to dry for 48 hours.  The acrylic water that leaked from the bottom dried to the cardboard cause some paint chips when I removed it this afternoon, but it isn't very visible as you see here in the final picture!


Overall it turned out alright, but I will be excited to try it again, knowing what caused the difficulties this time.  So stay posted for take 2!  

Also, check out other Pinterest Challenge projects over at Young House Love!