Last year we tackled the inside with all the painting. This year we are taking on the yard! Dad started us off by power washing my deck. I can not believe what a difference it makes. Here's a sneak peak, but look for more posts when the deck is complete. (No stain yet, just power washed! Amazing, right?)
So while Dad was working on the deck in back, Mom and I decided to take on the front yard. To start the morning right, Mom decided we could just pull this small dead tree out of the ground with our bare hands... Surprisingly, after a little see-saw action, we got it out of the ground, roots and all! I didn't remember the before picture, but here is the hole, ready for the new tree next week!
Then we started on the front flower bed. So far it has looked like a random group of weeds. This is what it looked like last summer.
Then last August before my belated "open house" party, I cleared out all the weeds and grass and arranged a few flower baskets so that it wasn't an eye sore.
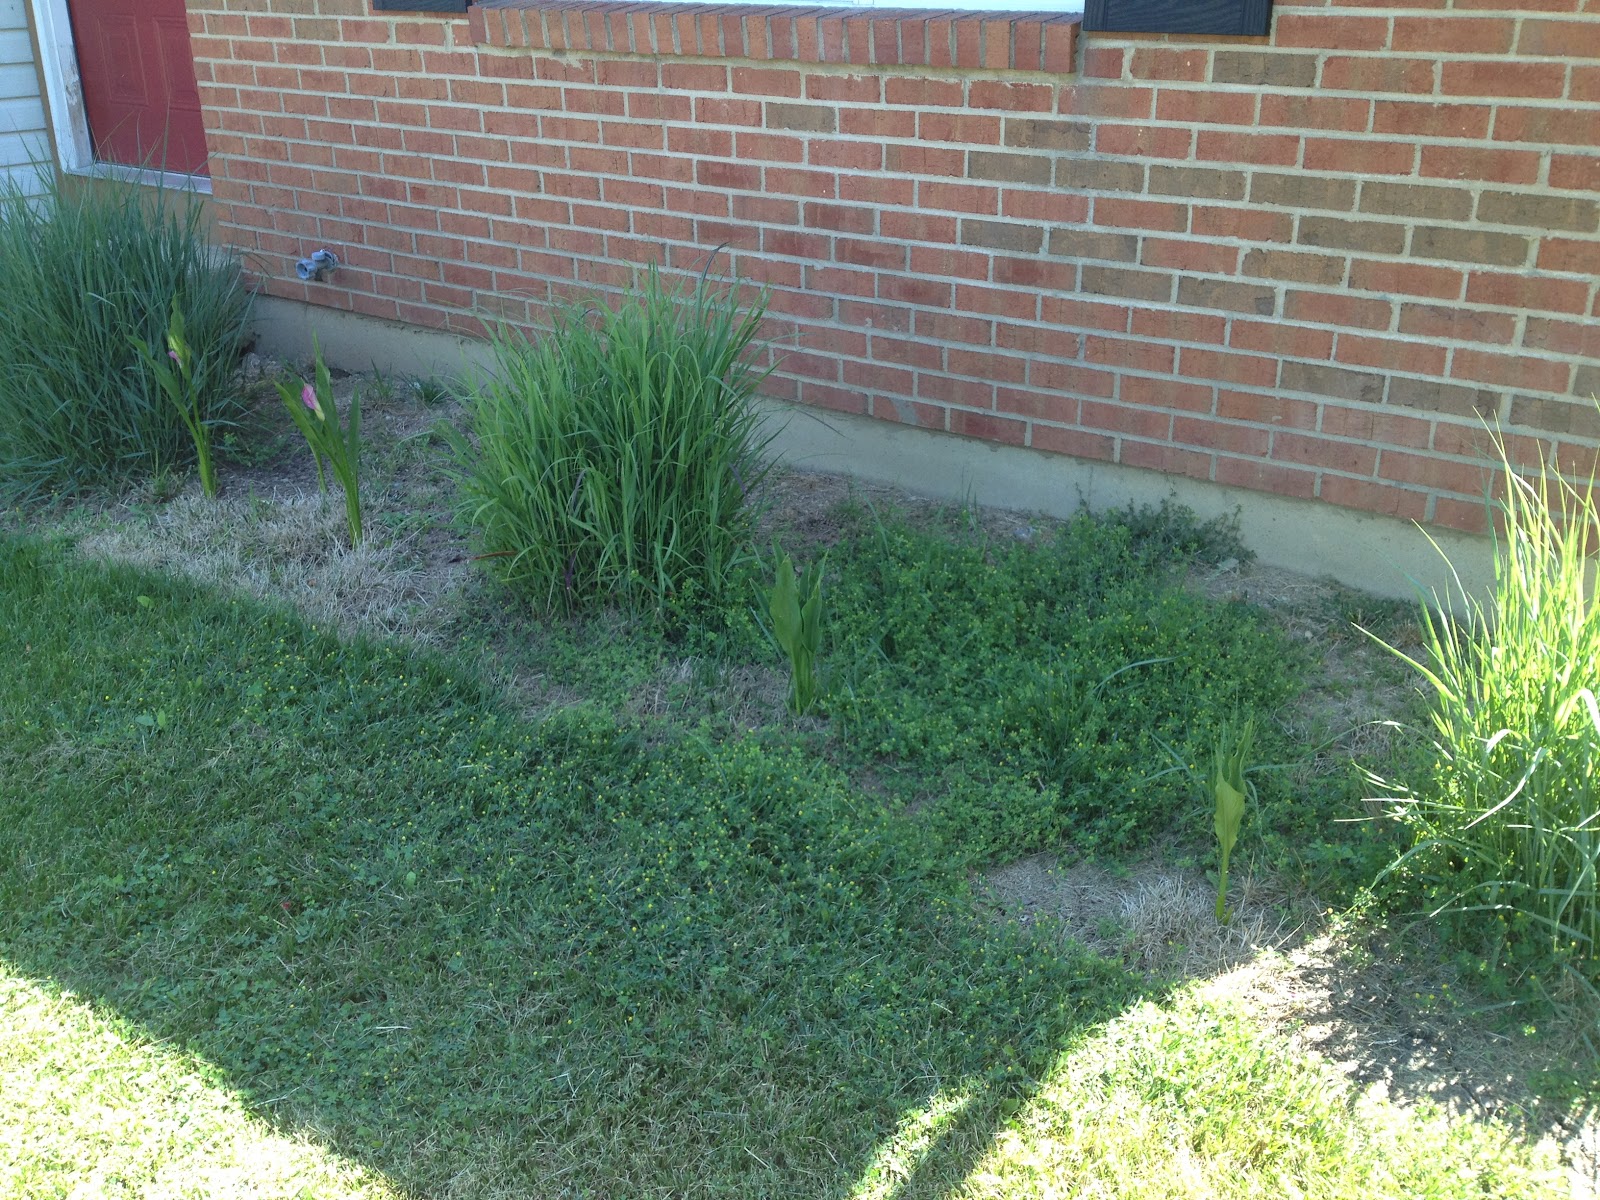
But by this time almost a year later it was looking pretty rough again...
After some hardcore weeding, some deadheading on the rosebush and THIRTEEN! bags of mulch, my front yard is finally starting to look like it's on purpose!
Stay tuned for the new tree for the front yard next week!
My mom bought me my first sewing machine recently and I couldn't wait to get started on a project. I found this cute little squared make-up bag to try out on Pinterest.
I've been loving owls lately and stumbled upon this little guy at a thrift store recently.
I immediately grabbed him up (for $1!!) and brought him home. After a few healthy coats of spray paint, I have a cute little owl to hang up on one of my many empty walls!
Not sure where to hang him up yet and so hesitant to start punching holes in the walls after working so hard to patch and paint them this summer! So for now, he doesn't have a home, but keep an eye out for him in future posts!
For my "Winter" project (I put winter in quotes, because it is 80 degrees and beautiful outside here in southern Ohio as I type this post! Crazy!!), I finally finished a project I've been planning on and working towards for a while. And though it didn't turn out quite like I'd hoped, I'm still happy to have it completed and not a complete disaster!
My Pinspiration originally came from Michelle at Sweet Something Designs. She created this neat little bottle cap tray that loved! I knew I wanted to make one for my guest room! Here is the original picture from her wonderfully made tray:
The hardest part - the part I've been working on - was collecting enough bottle caps in decent condition. I spent many nights working on that bottle cap collection and even have a friend collecting them for me now too! Once I found a tray at Goodwill to use....
I played around with the caps until I found an arrangement I liked...
Then I gathered the rest of my supplies - acrylic water kit, spray paint, & the source of my last bottle cap!
I spray painted the tray several coats of plum and the painted the caps an even number of plum, white and lavender. I let it try in the garage overnight. The next evening I collected all my painted caps and my tray and mixed the acrylic water set as directed. (Michelle's blog post suggested looking at Walmart for the least costly version and that's where I found the best deal!)
This is were I ran into a major problem... well, two problems technically. First, the handle holes weren't tall enough to allow me to use enough acrylic water to fill over top of the caps, which caused this weird film over some of the caps - the ones that got some on top before drying. Two, my tray wasn't put together as solidly as I thought and the acrylic water soon leaked out from the bottom all over my counters! I had to set it outside on some cardboard to dry for 48 hours. The acrylic water that leaked from the bottom dried to the cardboard cause some paint chips when I removed it this afternoon, but it isn't very visible as you see here in the final picture!
Overall it turned out alright, but I will be excited to try it again, knowing what caused the difficulties this time. So stay posted for take 2!
Also, check out other Pinterest Challenge projects over at Young House Love!
This summer there have been a lot of changes going on around here and I'm just about done with my summer "house overhaul!" I am hoping to update the House Tour page very soon with new updated pictures but until then, I'll share a few before and afters to show just how much better things are starting to look at my house!
Awhile back I posted a picture of the office, which sort of became the catch all while we were painting because it is the only room we weren't painting this summer. Here is what it looked like in the middle of our painting marathon:
And here it is after several hours of cleaning! (Same room, I promise!) :
It is very excited to be able to walk into the office again! Another before picture was posted recently after my parents surprised me by painting my bathroom for my while I was gone. Although the paint job was great, some major organization was needed:
And after a few hours and several little plastic storage totes with labels:
Now I can actually find things! And these are just a few of the highlights to my updated house - can't wait to share the new House Tour pictures soon, so stay tuned!
I headed out to the annual 127 Corridor (aka The World's Longest Yard Sale ever!) hoping to find two things. One - a bench for the foot of the bed in the guest room (to be my first "reupholster job"!). Two - a small desk/table to use as a vanity in the guest room (hoping for 25'' length or less - hard to find!).
The first stop was at a friend's house. I was there mostly for the quick visit, but did score this cute frame for 25 cents!
The frame is probably going to get some spray paint, but I'm still deciding what color. I originally thinking ORB-ing the frame and finding a neat little black & white picture to hang in the guest room. I was also thinking of spraying it silver and using it as a mini tray in the guest room. I'll have to think about it.
Before leaving this stop, I'd already spotted the next stop across the street. They had giant glass paneled doors for only $5! I really wanted one, but I have a little too much on my plate right now to commit to fixing up an old door. I've seen such cute ideas for those types of old doors, though, that one is definitely in my future!
Next, we headed off and after a few miles in both directions, we still hadn't found anything we couldn't live without. So we kept driving and ended up at a antique store running a 20% discount for the yard sale-ers. This is where my luck kicked in. I found both of the items I was looking for! I spotted the bench first and knew it was coming home with me right away.
I played it cool though, looked around some more, then came back ready to bargain down the price a little more. (Note: I left the actually bargaining to my Mom - she's much better than I am. I play my part well though, by staring at the item in question, shaking my head, then making several "thinking" sounds. Team work.) We got her down to 25% off and with my new bench in hand, we started heading out of the store. I was already thinking of what color fabric and paint I was going to use updating this bench when I saw the desk! It's an old writing desk and seemed like it was the perfect size for the vanity desk. I put the bench down and measured it with a borrowed tape measure - it was 26'' - almost perfect. I decided to take my bench for now and go home to re-measure the space in the guest room and possibly come back for the desk.
Once we unloaded the bench at my house, I headed straight for the guest room with measuring tape.
The exact length of the wall (the one the mirror is laying on) is 26''! I realized that the desk would stick out a little, though, because of the baseboards, but not only was this desk adorable, it was probably one of the few desks that will fit here! So we headed back for our second purchase of the day and ready to do some more bargaining (or in my case, head-shaking and thoughtful-sound-making). We got her to come down 30% on the writing desk, and once again, I was heading out of the store with my arms full! After a good dusting, I hauled the desk up stairs to see how perfectly the new "vanity" fit in the space.
Perfect! I already have a few update ideas for this piece too, however it'll probably be a little while before I get a chance to work on it. For now, the pieces will be sitting as-is in their intended places and we'll all just have to use our imaginations until I get around to the "after" part!
I shared my first Pinterest Challenge project this morning on Young House Love thinking that a few other readers might be interested and I would get a few more hits than normal, maybe a few comments. Within the the first hour I was already nearing the 100 views mark! At this point I've had over 450 people stop by my little blog to check out my first project - some half way across the globe!
And the overwhelming number of views is not all I'm nerding out about! I was just browsing (and procrastinating - yikes!) on Pinterest looking for new DIY ideas to try for the next challenge having been inspired by so many interesting ideas shared this morning when I cam across... my own project! Yep, thats right. My projects and blog have officially by pinterest-ized!
Eek! To quote Sherry @ YHL, "Geeked out and excited doesn’t even begin to describe it." :)
Last week I was in Cleveland on a mini vacation. You may be asking, "Cleveland? Really?" Yes. Cleveland. Who could resist after this inspiring "hastily made Cleveland tourism video"?
We did see the "art" and tried not to die! :) Fun was had, though, believe it our not. We went to the Rock N Roll Hall of Fame, of course.
We also made it to the zoo and rain forest.
We got faked a little culture at the art museum.
We found something more on our level with a children's money tour at the Federal Reserve Bank.
After learning (and practicing as seen in the middle picture!) how to pick out counterfeit money, learning a ton of slang terms for currency, and making our own money (in crayon...) we decided to head for one more adventure - a haunted mansion!
Franklin Castle is so haunted, that it is closed to the public. You are supposed to be able to hear people screaming from inside still...so we stayed in the car! (You can see the review mirror in the bottom left...evidence of my cowardice!)
After several hours of driving on the most dull interstate ever, we made it back home and headed straight for the bathroom thanks to our large cokes at lunch. I soon noticed that not one, but both bathrooms had been freshly painted! Apparently Mom and Dad had secretly been working on my house the whole time I was gone! (Yeah, they are pretty great like that!) Not only was this an awesome surprise, but it finished up our painting marathon!! No more paint fumes and drop clothes all over the house and no more super dark bathrooms! So, although I can't take credit for the bathroom make-overs (Mom&Dad also helped with the pictures for this too!), I will share the progress as part of the collective summer overhaul. So, let's start with the smaller downstairs bathroom.
Here is a before picture of the downstairs bathroom. You can see the awful, dark greenish-brown color and the beginning of primer work.
All primed (it took two coats) and no more ugly, darkness!
And now freshly painted in Fairytale Pink. It looks so much lighter now!
The same ugly, dark greenish-brown was also used in the upstairs bathroom, so I decided to continue with the light pink. Before I left and before the painting started we did make a few help modifications. First, we added hooks to the wall right outside of the shower -a much more convenient location.
Next, I moved the toilet paper holder, which was quite a reach, from here (white patches under the towel was the original location)....
...To here. Another much more convenient switch and I updated the holder to one more my style.
Once these basic switches were made pre-Cleveland trip, Mom and Dad jumped right into priming the upstairs.
All primed, after a couple of coats. The dark ugly color is completely gone from the house -hooray!
And the whole room is now much much lighter in pink!
Now I just need to get the shelves organized - yikes! (Working on this now - stay tuned!)