Inspired after reading Kate's blog & her race to 101 goals, I decided to give it a try also - but on a much smaller scale. I have four goals for the upcoming year.
Goal 1: Get my "new" house updated, decorated, and organized for
an end-of-summer party!
(Keep track of updates and DIY decorating projects on this blog!)
Goal 2: Read 25 books...at least.
(See my book blog for my To-Read list and to track my progress!)
Goal 3: Donate several time/money/items to charity. This includes my hope
to make at least 4 scarfs to donate next year (inspired by a friend).
Goal 4: Become healthier - eat well, exercise, avoid/decrease stress.
Wish me luck on meeting my goals! Hope to be able to check all of these off by next year at this time!

Sunday, December 19, 2010

Friday, December 17, 2010
DIY #6 - Shutter Memory Board
I had seen many creative uses for shutters in home decorating - hung as shutters on wall, converted into headboards in bedrooms, and turned sideways to make a sort of memory board. I decided I wanted to try the memory board idea, and I started with an old wooden shutter that my mom found unique little shop on a day-trip.

Next, I grabbed some white paint and set up a little painting station in the basement. Every time I headed down the the basement for something for about week I painted on a thin layer over the dark maroon color.

Finally, after what seems like twenty coats, I added some think cork material to the back to keep things from falling through and to prevent it from rubbing on the freshly painted bedroom wall. Then it was ready to be hung up!

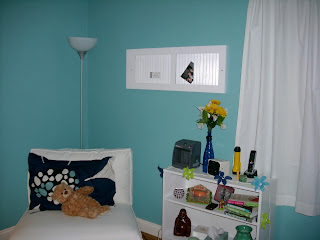
I only put a picture and an old ticket in to "try it out", but didn't fill it up because I need to switch out the screws to make it a little more secure. Keep your eyes peeled for a more "memorable" shutter in future bedroom updates!
Total Cost: $4 (free shutter -thanks Mom!, already had paint & brush, cork $4)

Next, I grabbed some white paint and set up a little painting station in the basement. Every time I headed down the the basement for something for about week I painted on a thin layer over the dark maroon color.

Finally, after what seems like twenty coats, I added some think cork material to the back to keep things from falling through and to prevent it from rubbing on the freshly painted bedroom wall. Then it was ready to be hung up!


I only put a picture and an old ticket in to "try it out", but didn't fill it up because I need to switch out the screws to make it a little more secure. Keep your eyes peeled for a more "memorable" shutter in future bedroom updates!
Total Cost: $4 (free shutter -thanks Mom!, already had paint & brush, cork $4)
Saturday, December 4, 2010
DIY #5 - Mirror Update
I picked up a mirror (among other things) at the St. Rt. 127 Yard sales a few months back.


Total cost: $25 ($7 for Mirror, $4 paint, $8 for glue materials, $6 for marbles)

I bought the mirror for $7 outside of an older farm house. The woman at the sale said the mirror was over 40 years old, and though it was in great condition for its age, it needed a makeover. So, after it sitting downstairs untouched for a few months, I finally decided what I was going to do after seeing a picture of something similar in a decorating magazine!
I took the back off and pulled the mirror out, then painted the frame the same silver spray paint I used for the lamp (see the last post). While the frame dried in the garage, I headed to a craft store for clear marbles and a glue gun.
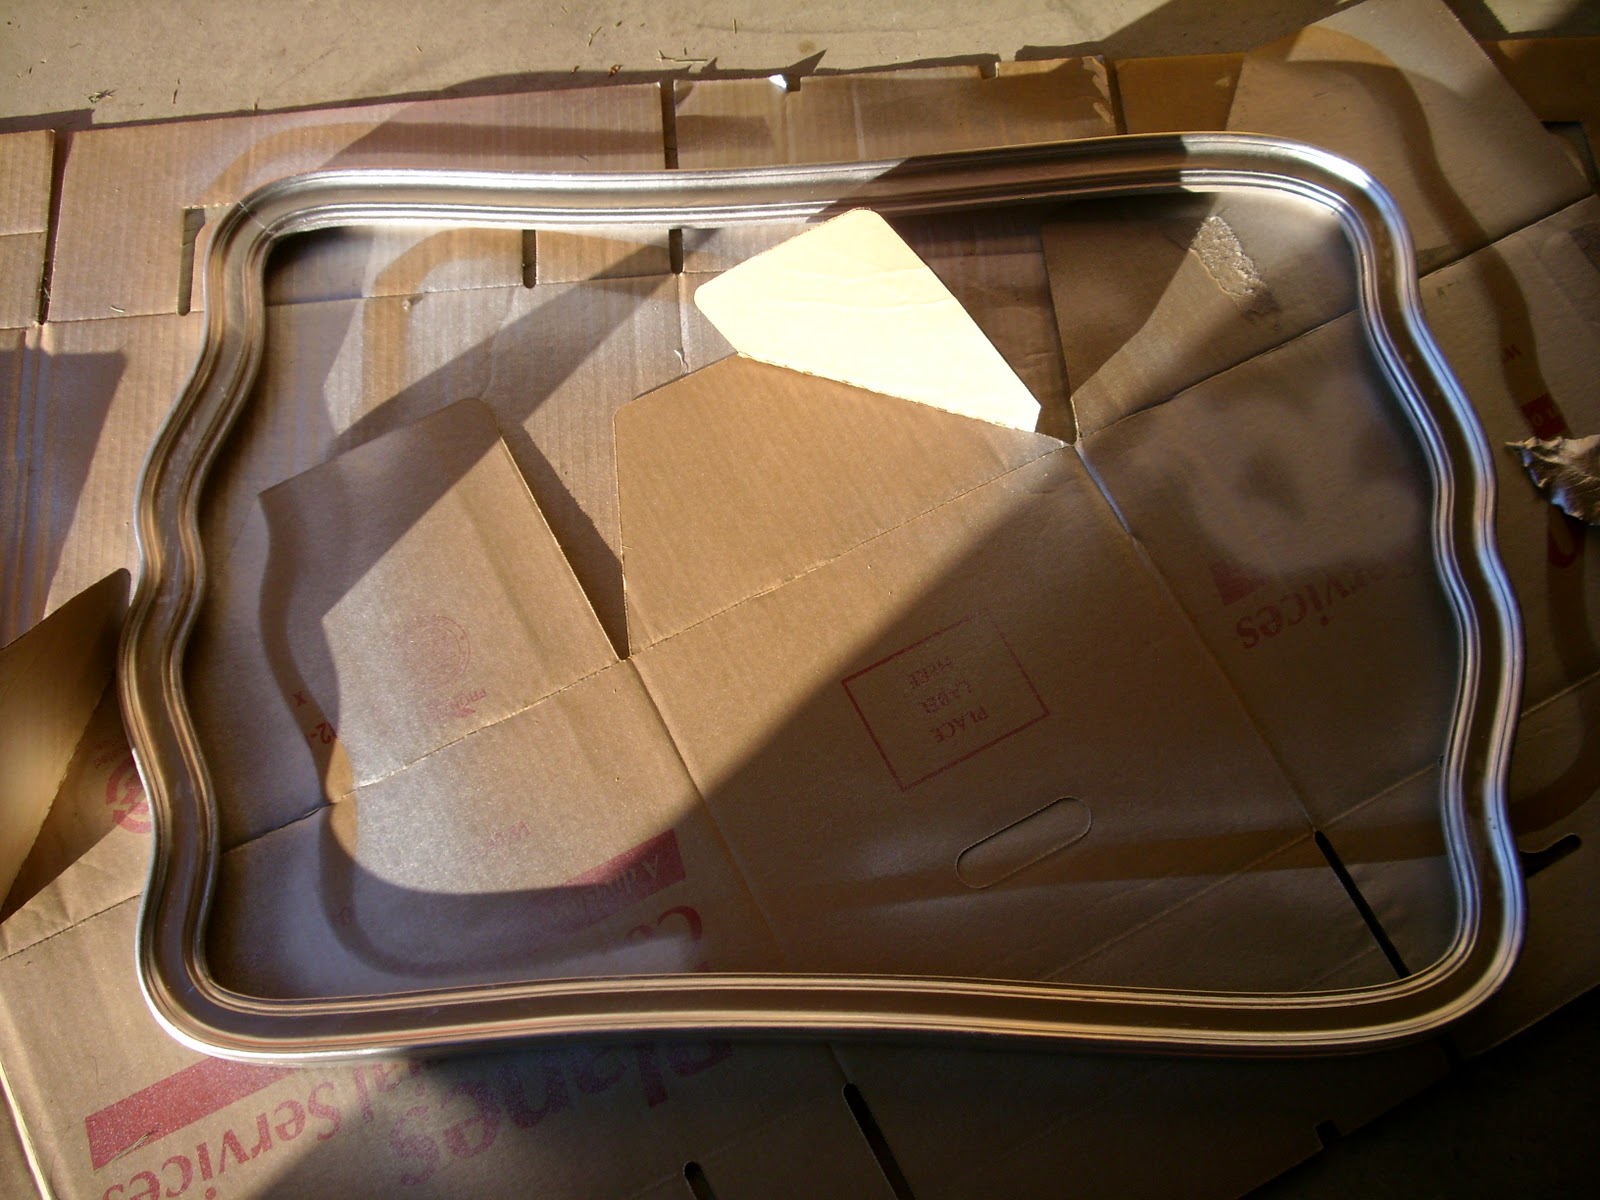
When I got home, I started gluing, working my way through two bags of marbles and countless glue sticks.

When I had about half of the marbles glued down, I realized I should have attached the mirror and backing before adding the marbles, but the gluing was done.


Next, I scrubbed the old mirror surface with cleaner and used a razor edge to scrap off some old paint, then nailed it back into place. As I expected, the use of the hammer knocked off some of the marbles, but I broke the glue gun back out and had it all fixed up in under five minutes. Lesson Learned: Attach the back before you glue anything to the front! No matter, I'm thrilled with the final product and I can't wait to get it hung up!


Total cost: $25 ($7 for Mirror, $4 paint, $8 for glue materials, $6 for marbles)
Sunday, November 28, 2010
DIY #4 - Lamp Update
 A week or so ago, I bought a plain candlestick lamp with plain
white shade at a friends indoor yardsale for $5. Even though
I've been meaning to since I got it,I forgot to take a "before"
picture before I broke out the paint today.
It looked a lot like this though.------------------------------>
I tried to decide what color to paint this lamp - I'd seen several pictures online of painted lamps and fell in love - and finally went with silver, knowing it could paint it again in the future if the color gets old or begins to clash with the room. So I headed out for some spray paint and ended up picking up some blue ribbon for the shade.

Here is a picture of the lamp after a few layers of paint.
And below are two pictures of the lamp with the ribboned-out lamp shade.


Total cost: $15 ($5 for lamp, $4 for paint, $3 for ribbon, $3 for light bulb.)
I'm planning to use this lamp in my "new" bedroom (see last post).
Look for it in the next bedroom update! :)
Saturday, October 30, 2010
Bedroom Update #2
Inspired by the new paint & some "extra" money, I headed to Ikea! I brought home the Kivik one-seat sectional in white and the Malm 6 drawer chest in white to add to my sparse bedroom. The new pieces also lead me to move the furniture a bit. Here's what it looks like now:


More updates to come as I continue to decorate - - Stay tuned!


More updates to come as I continue to decorate - - Stay tuned!
Saturday, September 11, 2010
Bedroom Update #1
When I first looked at my house about a year ago, I fell in love right away. I did not, however, love the colors that the previous owners had on the walls.

This color was horrible! Immediately after buying the house, we put up some primer to get rid of this horrible color. I moved in before I got a chance to pick out a new color though.

And finally, almost a year after I first looked at the house, the bedroom is painted! I went with a color from the Seaside Retreat collection from Valspar. The color is called Lily Creek.

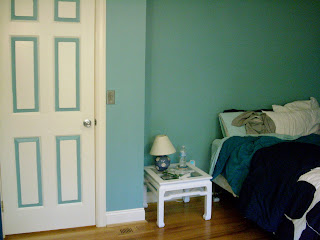
Exhibit A: The original bedroom.

This color was horrible! Immediately after buying the house, we put up some primer to get rid of this horrible color. I moved in before I got a chance to pick out a new color though.

And finally, almost a year after I first looked at the house, the bedroom is painted! I went with a color from the Seaside Retreat collection from Valspar. The color is called Lily Creek.


Sunday, August 8, 2010
DIY #3 - Broken Pin to Magnent
I bought a pretty purple and silver pin...

...at Loch Katrine in Scotland a few summers ago,

...but it broke before I even made it home from Europe. I didn't want to get rid of it, so it ended up in the bottom of a drawer. I found it again a few days ago and got an idea...

I glued on two small magnets, and now I have a cute, unique refrigerator magnet with a great memory attached!


Me wearing the pin
...at Loch Katrine in Scotland a few summers ago,

One of my pictures of Loch Katrine
...but it broke before I even made it home from Europe. I didn't want to get rid of it, so it ended up in the bottom of a drawer. I found it again a few days ago and got an idea...

I glued on two small magnets, and now I have a cute, unique refrigerator magnet with a great memory attached!

Tuesday, July 20, 2010
DIY #2 - New Nightstand
I found this cute little table in the middle of an aisle in my favorite local thrift store and I had to have it.

After an insane trip to get the table home in monsoon-like weather, it eventually made it safely back to my garage. Next, I headed out to Lowe's for some sanding and painting materials. After quite a bit of sanding, two coats of paint, and some touching up with left over spray paint, my new table was finally coming together. With a freshly cleaned glass top, I replaced my old nightstand with my good-as-new table!

Total out-of-[my]-pocket cost: $35

After an insane trip to get the table home in monsoon-like weather, it eventually made it safely back to my garage. Next, I headed out to Lowe's for some sanding and painting materials. After quite a bit of sanding, two coats of paint, and some touching up with left over spray paint, my new table was finally coming together. With a freshly cleaned glass top, I replaced my old nightstand with my good-as-new table!

Total out-of-[my]-pocket cost: $35
Saturday, July 17, 2010
Cooking #1
I found a cute recipe for Bacon, Egg & Cheese McMuffin Cups via the Picky Palate website. (Link: http://picky-palate.com/2010/05/06/bacon-and-cheese-egg-mcmuffin-cups/)
I think they turned out well, but I used a regular muffin pan instead of the Texas sized cups and found it a little challenging... but they tasted great and were fairly easy to make!
Here is there's:

And here is mine:

I also love the Hungry Girl cookbooks - if you haven't heard of these you need to (Check out the website at http://www.hungry-girl.com/)!! One of the recipes I tried recently was for the Chicken Fajita Pitas. I decided to use regular tortilla's instead of pitas, but they turned out amazing. The recipe is very simple: chicken, onions, and green peppers with fajita flavoring with lettuce and sour cream, wrapped up in a tortilla! Yum! Here's what it looked like while it was cookin'...

I think they turned out well, but I used a regular muffin pan instead of the Texas sized cups and found it a little challenging... but they tasted great and were fairly easy to make!
Here is there's:

And here is mine:

I also love the Hungry Girl cookbooks - if you haven't heard of these you need to (Check out the website at http://www.hungry-girl.com/)!! One of the recipes I tried recently was for the Chicken Fajita Pitas. I decided to use regular tortilla's instead of pitas, but they turned out amazing. The recipe is very simple: chicken, onions, and green peppers with fajita flavoring with lettuce and sour cream, wrapped up in a tortilla! Yum! Here's what it looked like while it was cookin'...

Tuesday, July 6, 2010
DIY #1 - Toilet Paper Roll Artwork

I found this awesome DIY art project that I thought would be awesome for a little decoration over my TV in the living room... so I started collecting toilet paper rolls with help from my whole family. The original idea -->
After many attempted designs and a few layers of white spray paint, I have something to hang up.
Mine:

Once I hung it up, though, I found that it didn't quite fill the space as I'd hoped, so stay tuned for updates on this project (either additions or a totally new design!)
Original source: Design Sponge
http://www.designspongeonline.com/2009/11/diy-project-toilet-paper-roll-wall-art.html
Subscribe to:
Posts (Atom)